Tuesday, March 4, 2014
Router Week

In my shop I use my router on nearly every project I build. After my table saw, it is my next most important woodworking tool. Equally important is my router table. I rarely use my router in hand-held mode.
I use an inexpensive Craftsman table, but eventually I will get around to making a table that suits me better. Last week I asked for you guys to send pictures of your router tables. Ill be posting them here all week. If youve been thinking about making one, I hope these will give you some ideas. The possibilities are endless.
Warren Downes
Warren calls this a $15 / 15 minute router table. My kind of budget! (Note how the fence just swings on a pivot.)
I made this super cheap router table from scrap wood and a few bolts, im only new to wood working and had no idea how easy it was going to make my life, i seem to hardly take the router off the board.
Its just a piece of MDF with the router bolted to it and pine for the fence held by a clamp on one end and a bolt and wingnut on the other.
I can clamp it to my bench or table saw very quickly and takes up no room in the garage.


John Hendricks
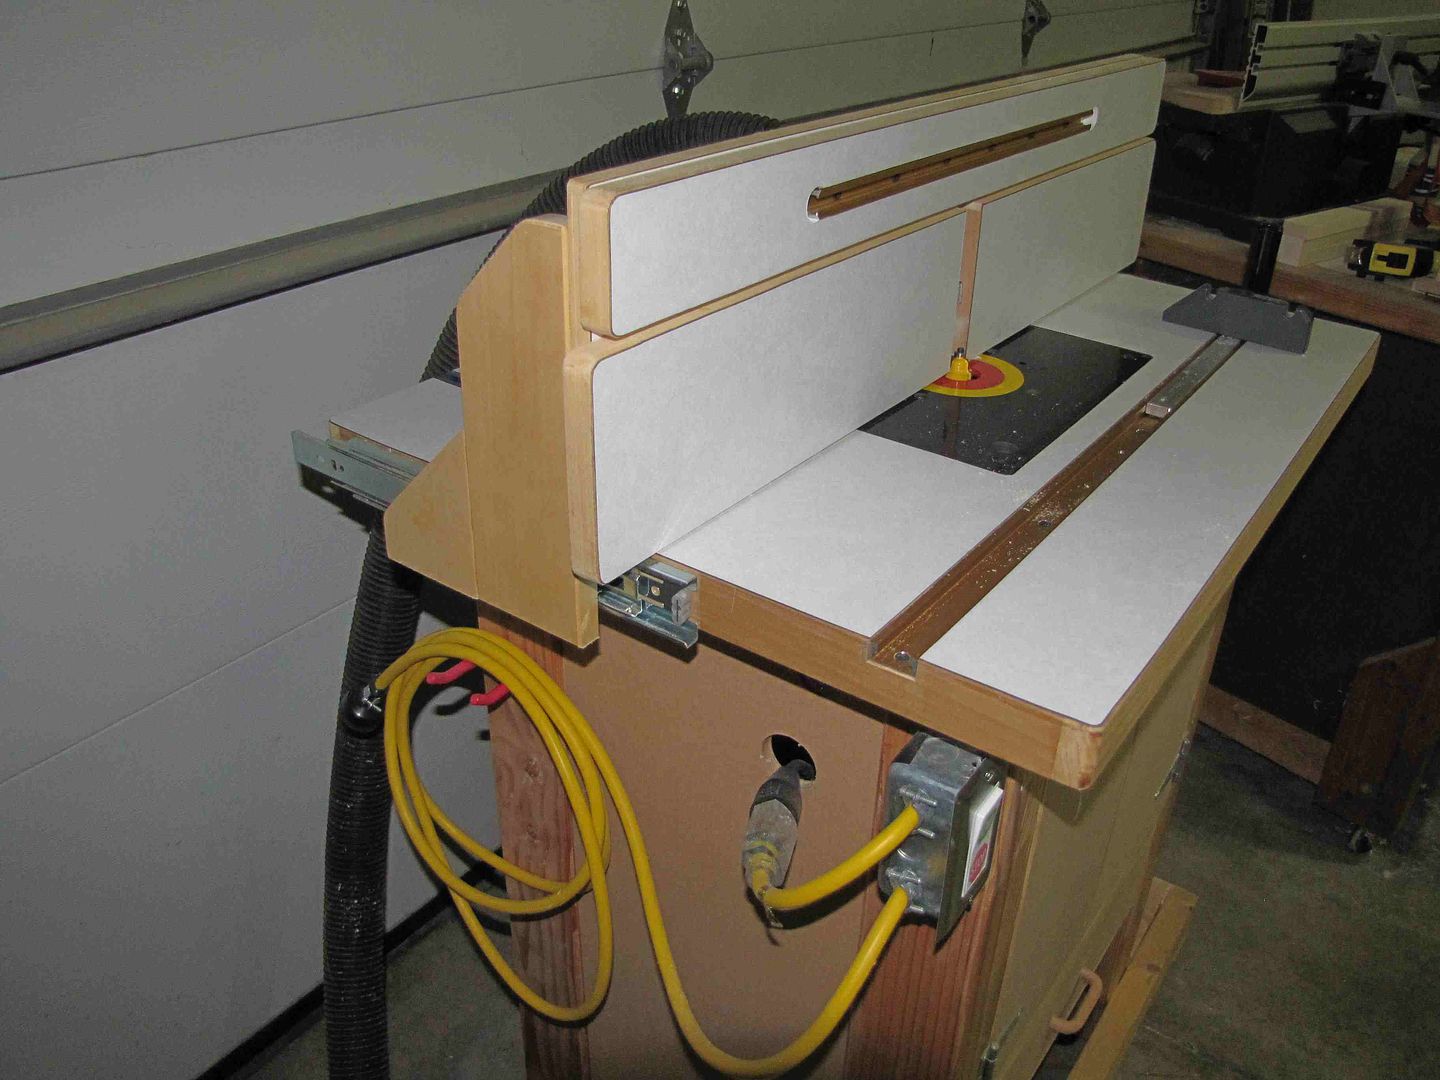
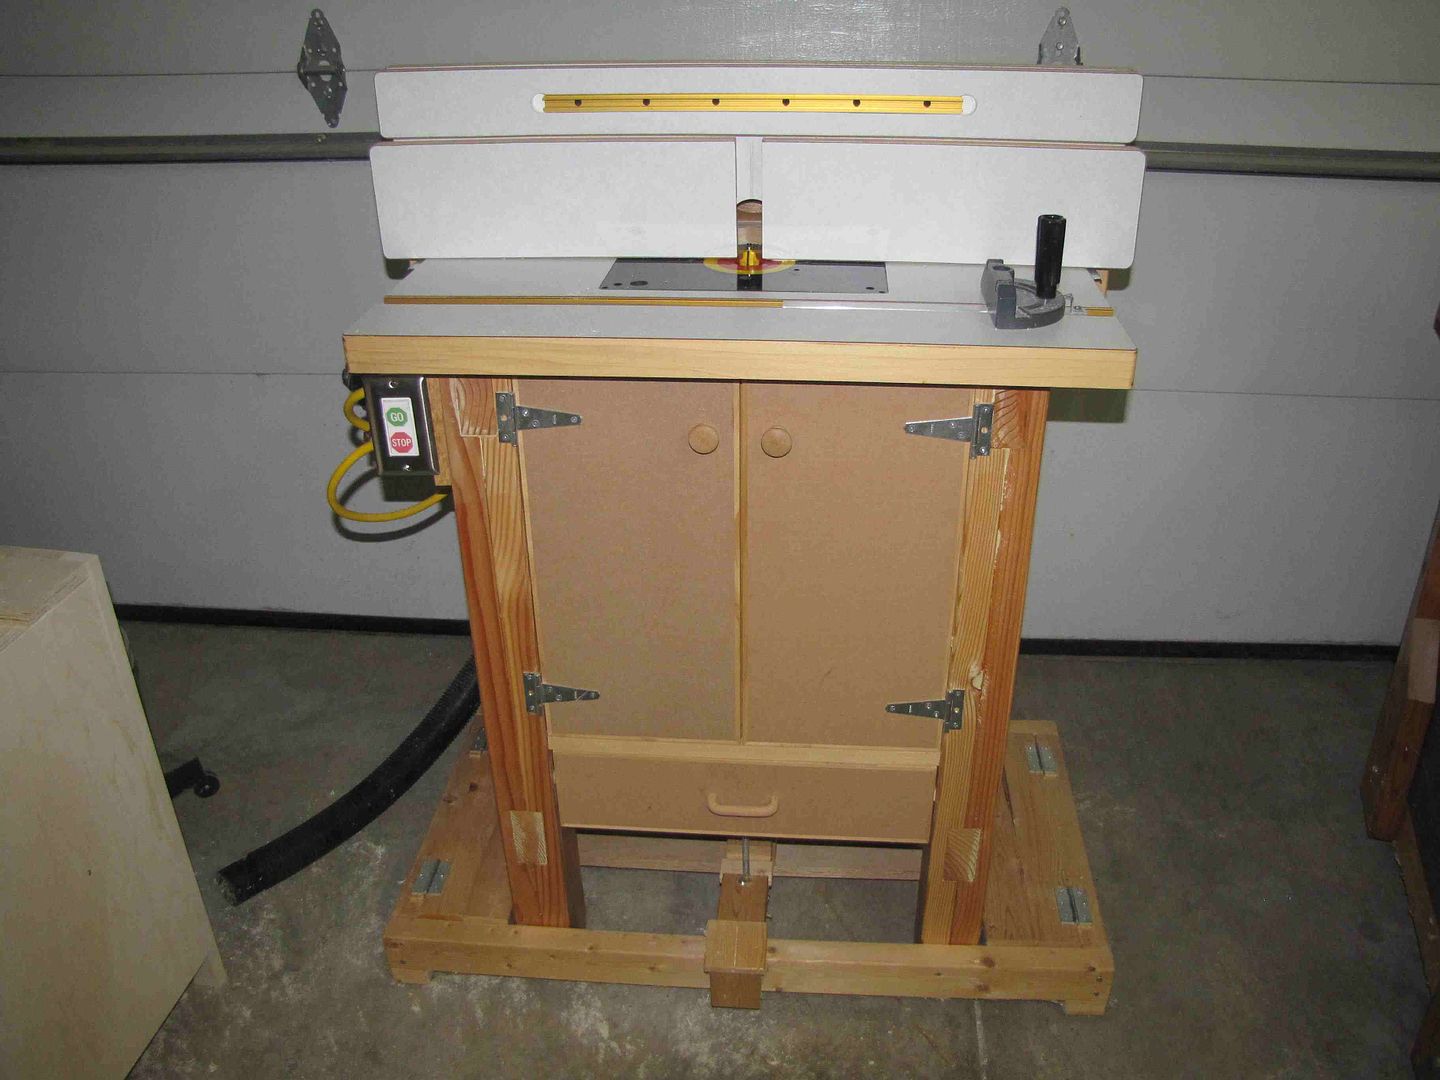
Here is Johns router table. To call it just a "table" hardly does it justice.
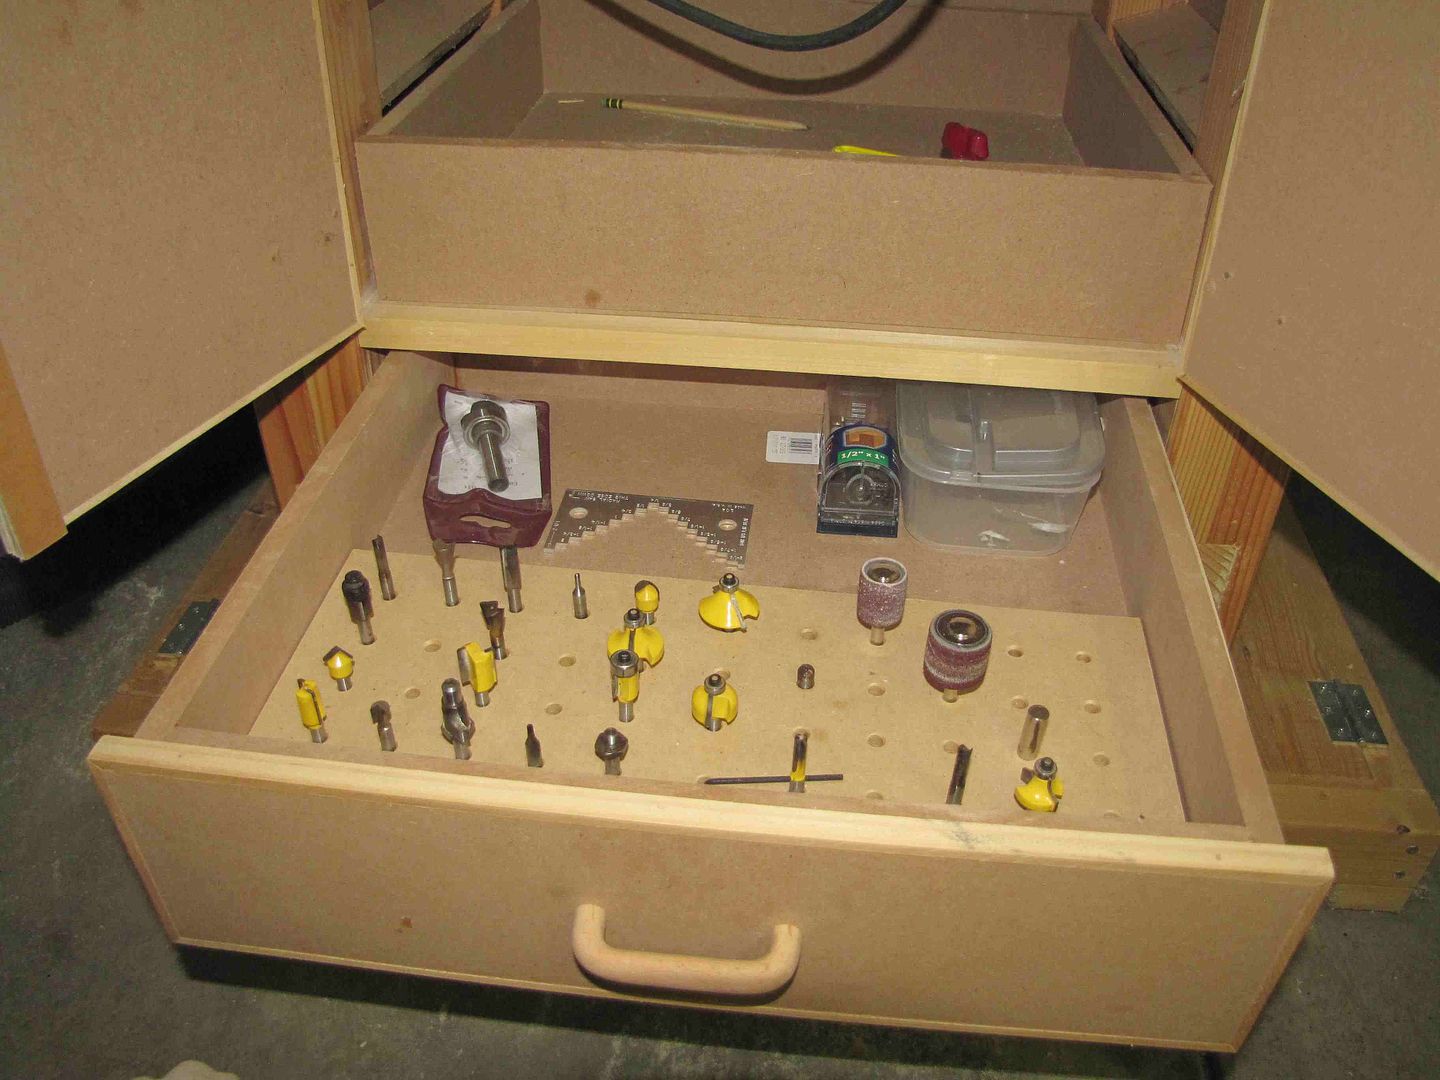
It was a lot more work than I had planned on, and when I finished I was done with woodworking for awhile. All and all Im glad I spend all that time because I love this table. Its probably my best tool. When I got done I went out and bought a new router cause I couldnt bare putting my old router in this thing. I did a lot of research to incorporate different features. This is a combination of ideas from various places and a few of my own. Things I incorporated into the cabinet:
-Laminated the top (both top and bottom for strength)
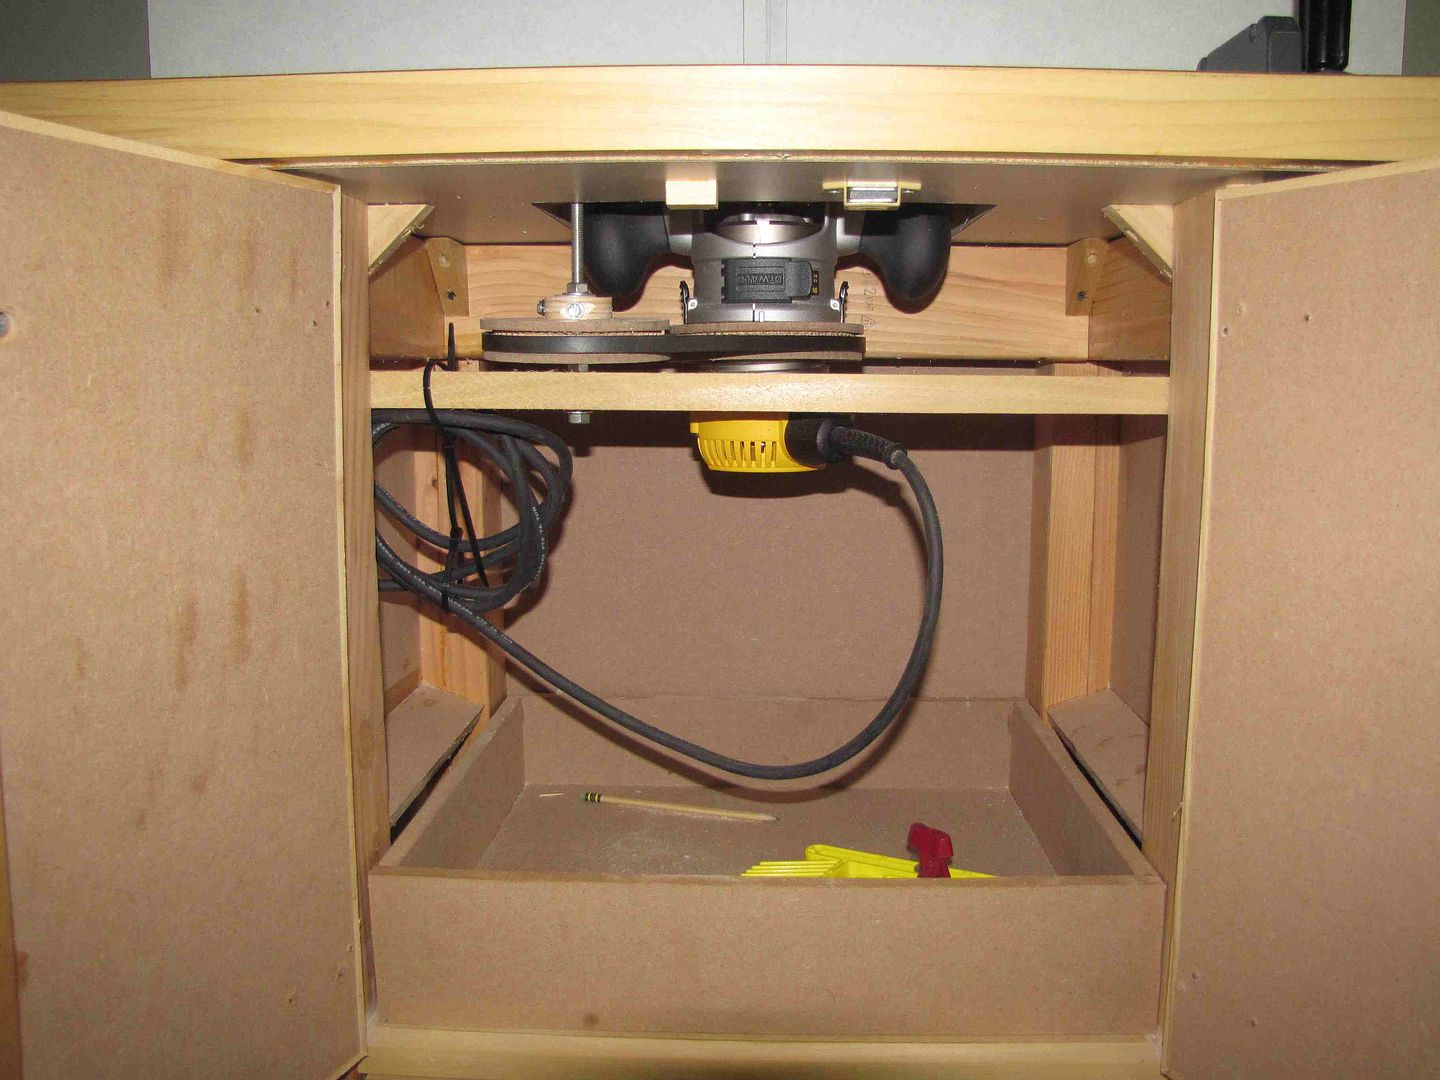
-Closed cabinet makes less noise
-Top is about 1 1/2" thick.
-Miter slide
-Can mount feather boards in miter slide or up on the fence
-A drawer for storing bits and other router stuff
-Dust collection
-Mobile base
-The fence slides on drawer rails. This was kind of tricky, but I love this feature. Lock down from back.
-Adjustable wings on each side of bit.
-Laminated wings so stock slides easy.
-A paddle switch to power on and off router without reaching under cabinet
-A pullout box under router to catch most of the saw dust, also for more storage.
-Lift. This was tricky, and I experimented with different ideas. Simplest idea worked best. Made two wooden gears with a belt between. Can adjust height from above table.


Subscribe to:
Post Comments (Atom)

No comments:
Post a Comment